Aggregator Groups
Our system supports Aggregators being grouped into different sets, allowing offers to be segmented. Depending on the grouping criteria, Aggregators may be assigned specific offers with their respective commissions.
Upon accessing the Aggregator Groups sub-section, a table displaying all your current groups, a search bar, and a Create new Group button will be presented. The fields of each group presented in this table are:
| Field | Description |
|---|---|
| Name | The name of the aggregator group. |
| Description | The description related to each group. |
| Aggregators Numbers | The current number of aggregators belonging to each respective group. |
Default groupA default group that stores will be assigned to by default if they have not previously been assigned to a group.
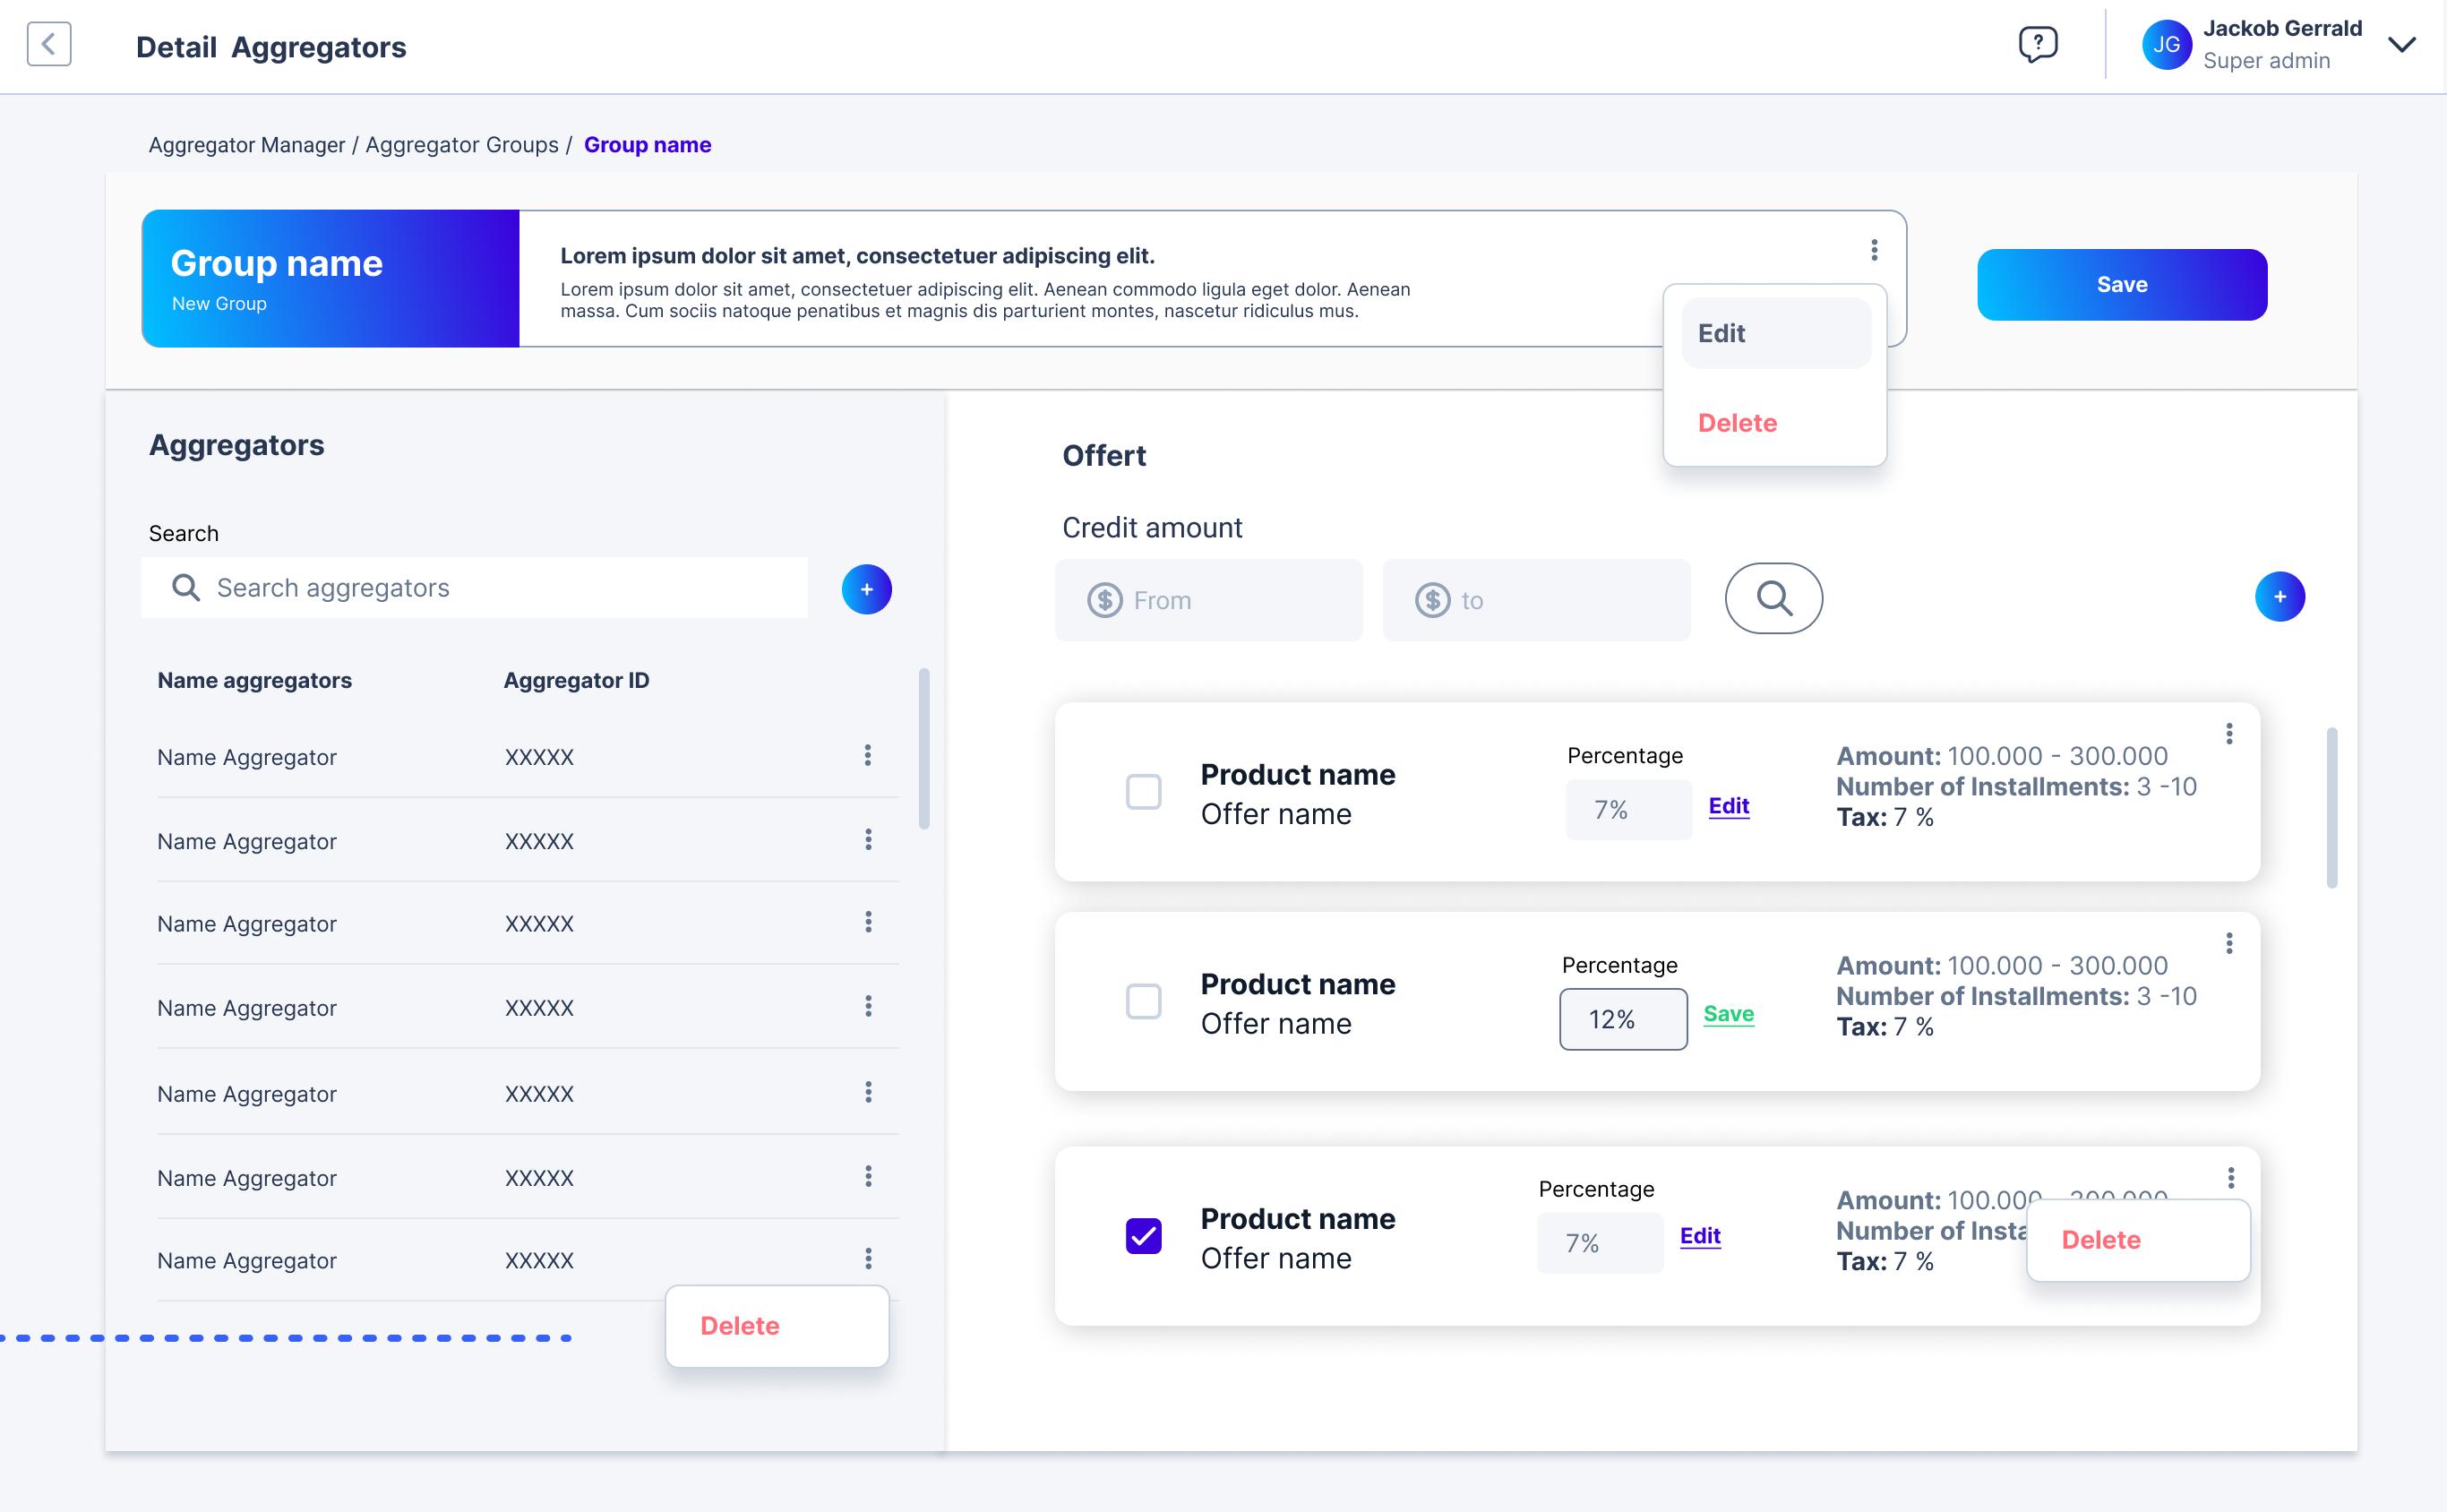
Aggregator Group details
By clicking on an aggregator group row, you will be redirected to their respective details page, presenting the details of the group, such as:
- Aggregators: A list of all aggregators belonging to this group. Along with a button to add new aggregators, and the option to remove current aggregators from the group.
- Offers: A list of all offers associated with the respective group. Each offer can have its commission edited here. Also, you can remove the offer from the group and add new offers.
The image below presents an example of the group details page:
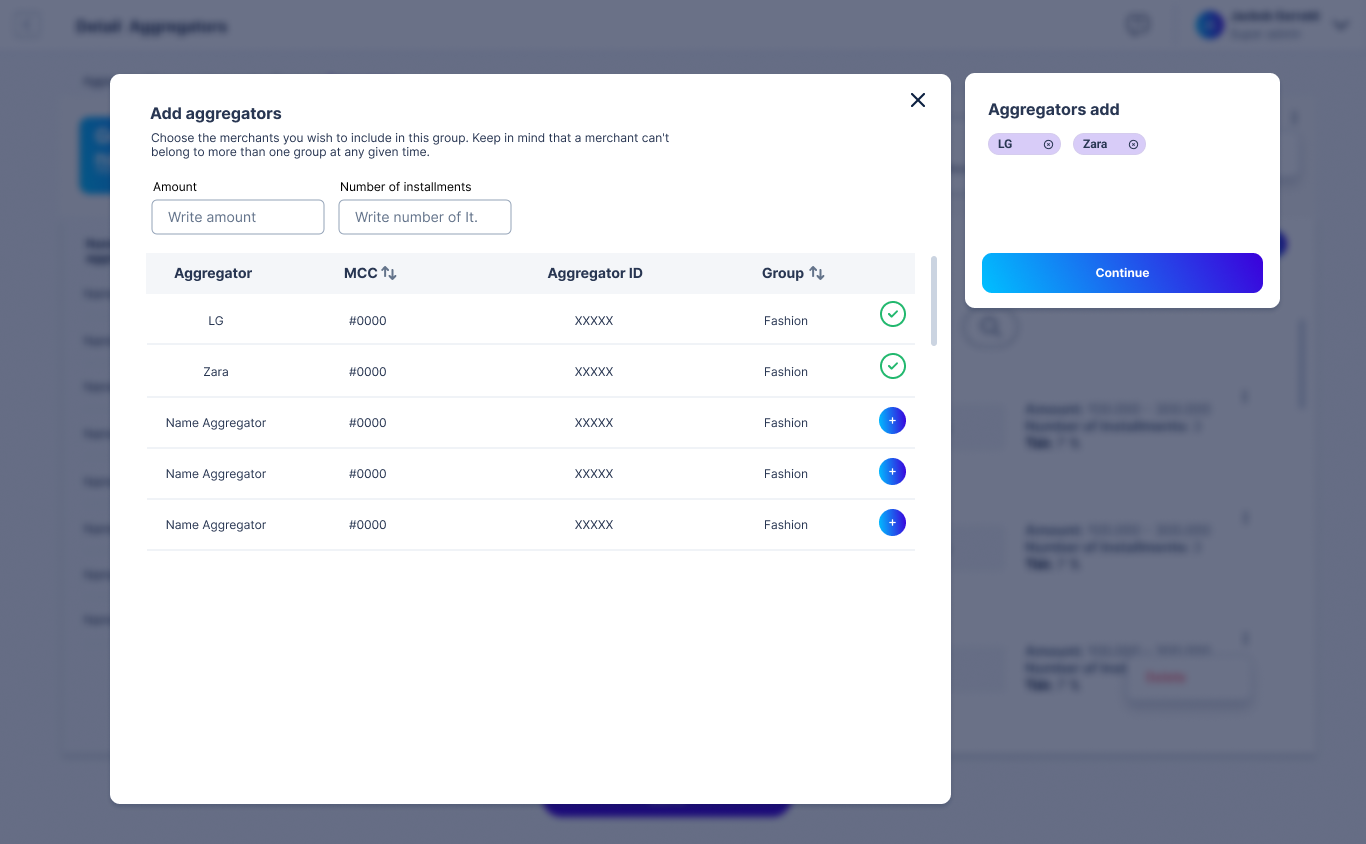
Adding an aggregator
If you need to add a new aggregator to an existing group, click the + button on the Aggregators tab. By doing so, a window will appear, allowing you to choose as many aggregators to add as needed. The image below exemplifies this process:
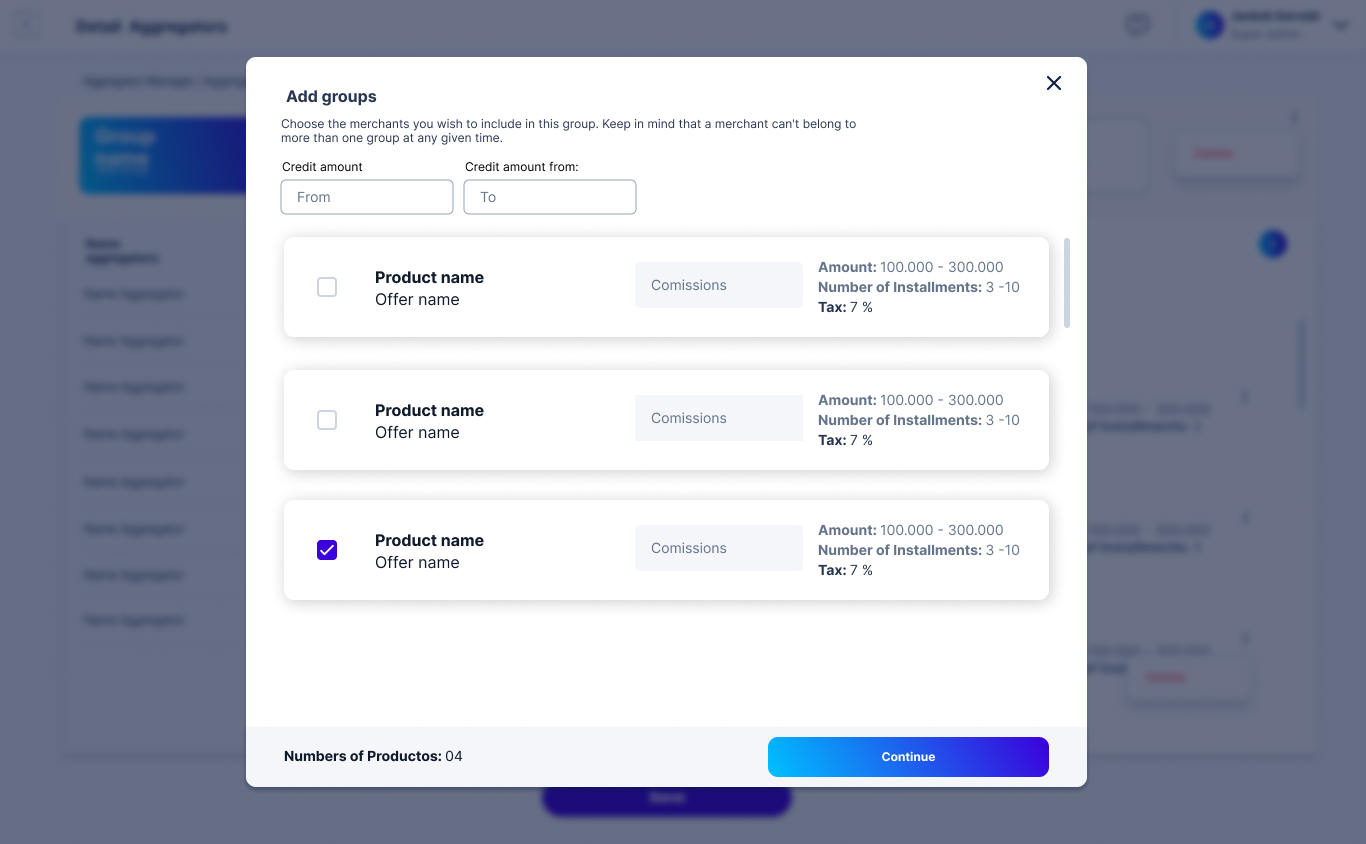
Adding a new offer
To add a new offer to the current Aggregator group, click the + button on the Offers tab. This button will prompt a window, allowing you to select new offers to add and set their respective commissions. The image below exemplifies this process:
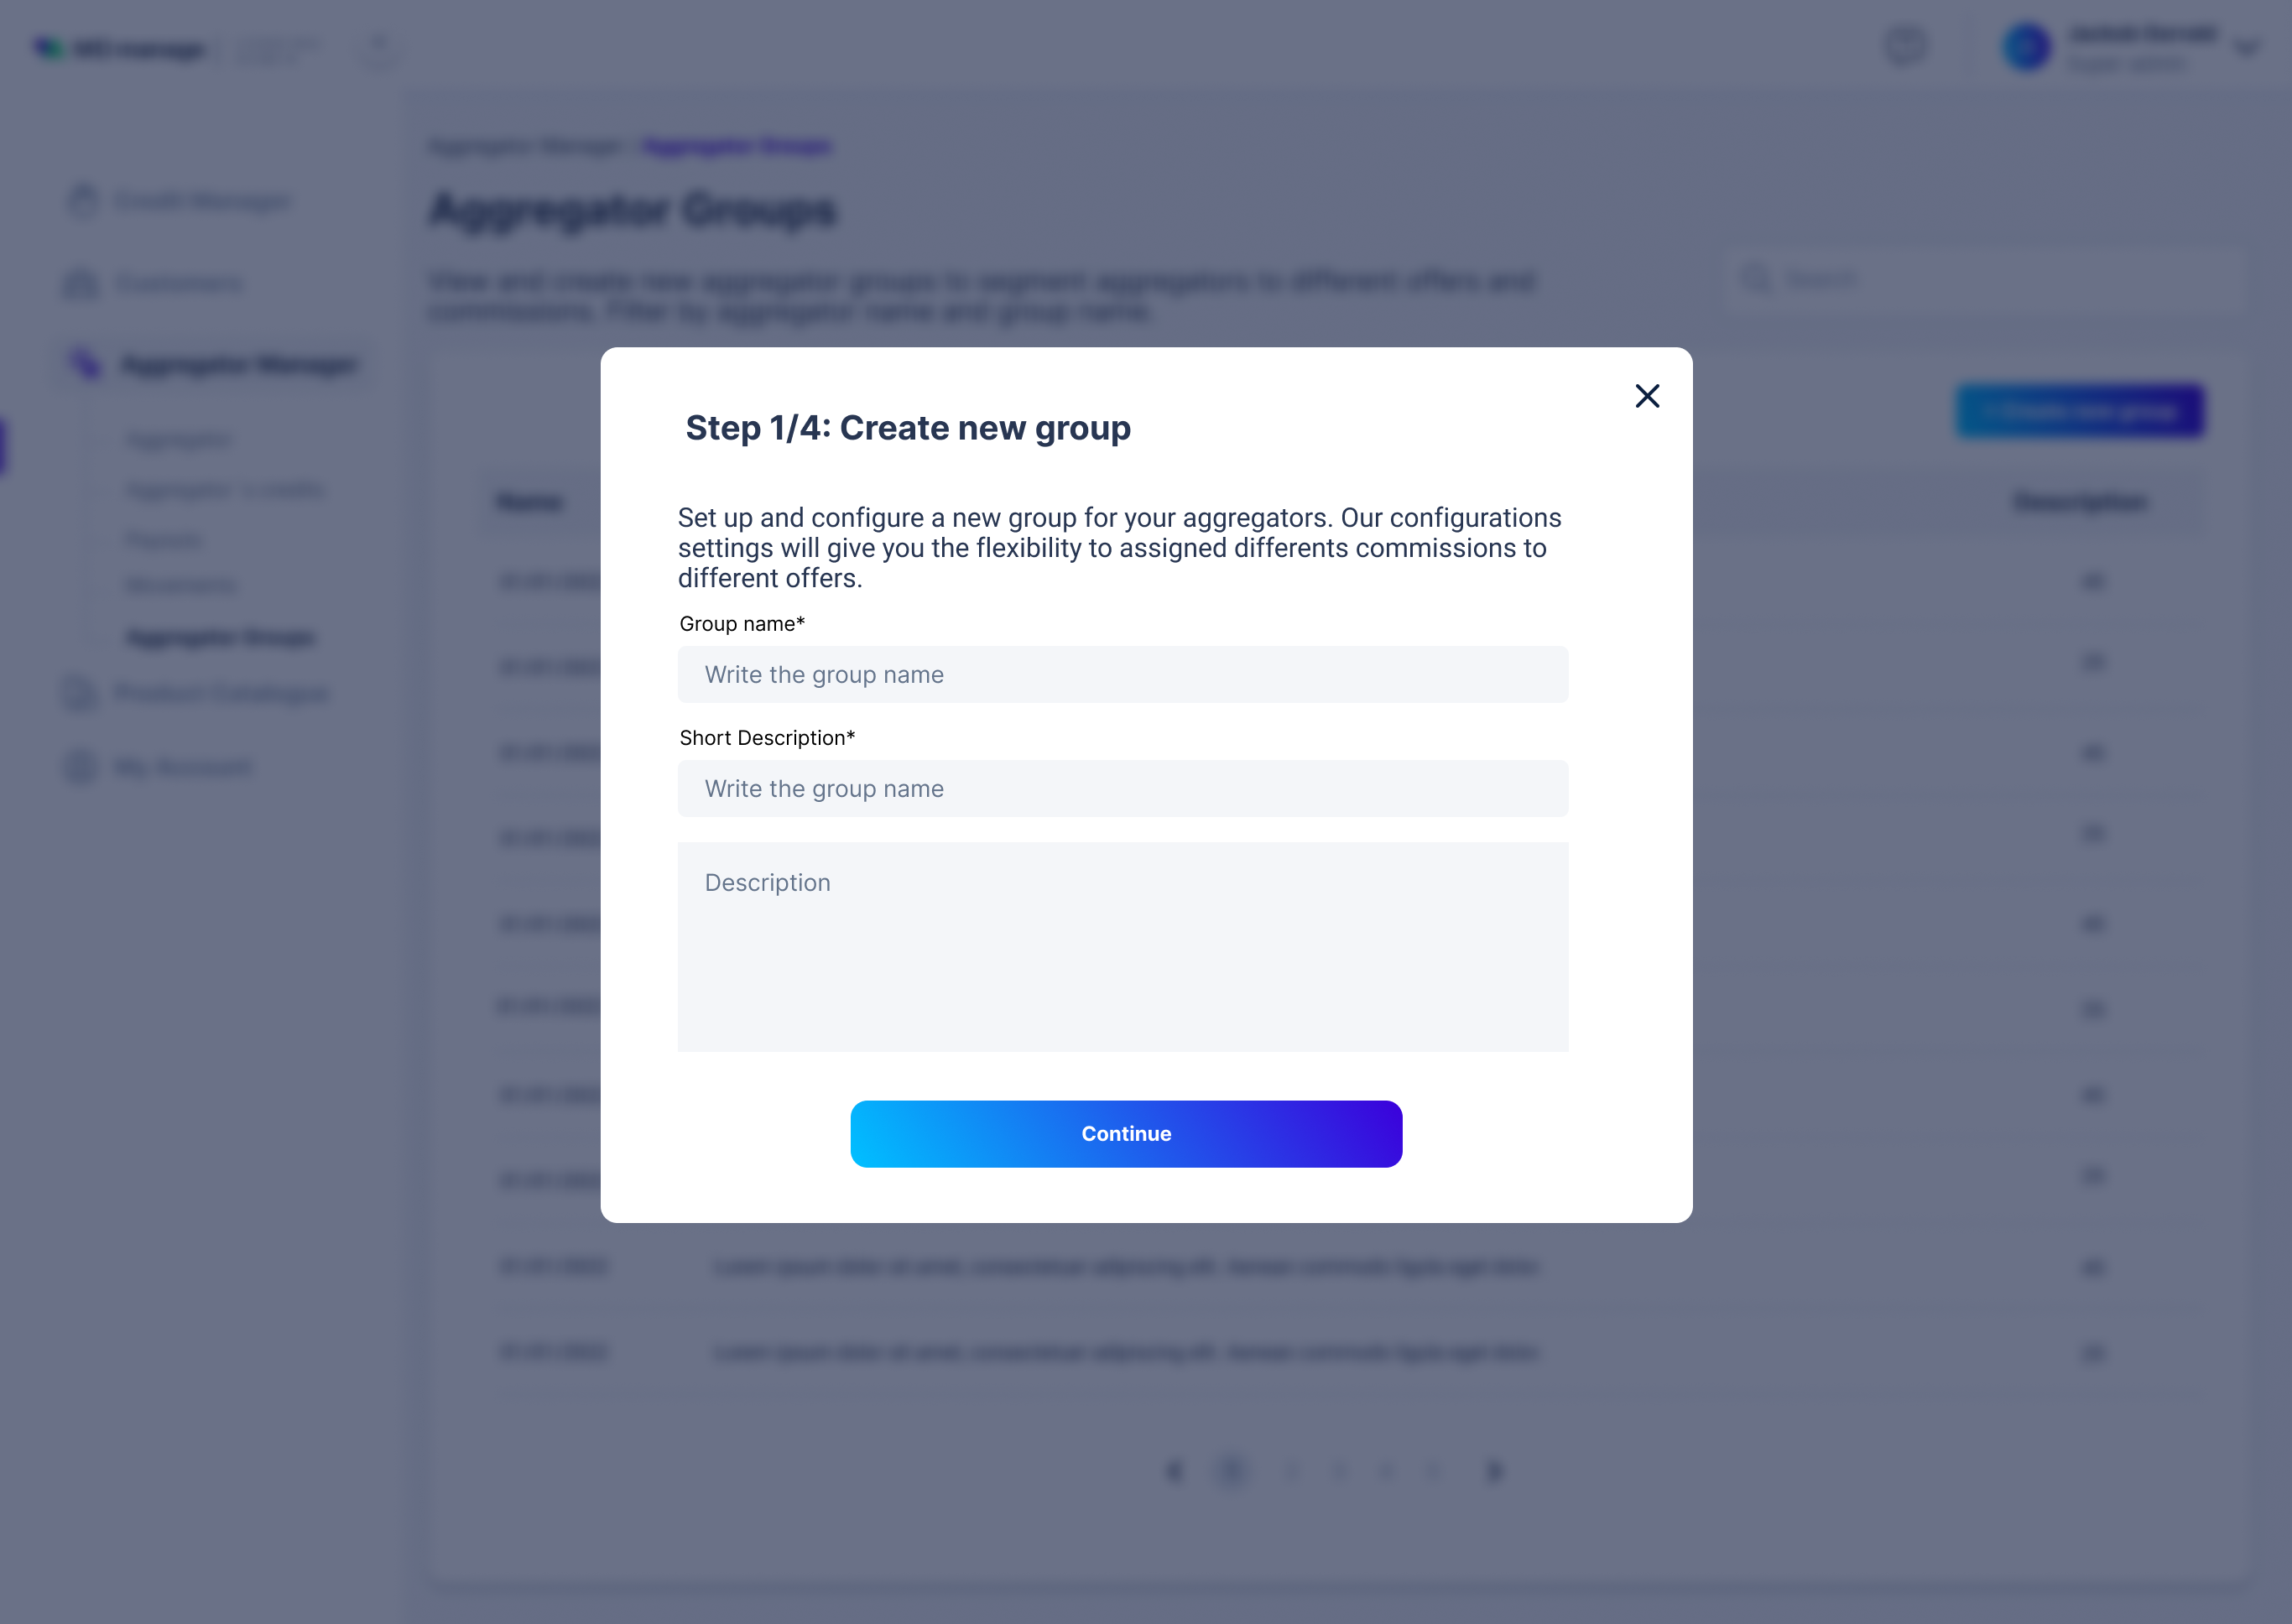
Creating groups
If you need to make a new group, you can do so by clicking the button labeled Create new group. This will allow you to set up a new group with the parameters and specifications needed. After clicking the Create New group button, you can follow the steps below.
Super adminOnly the super admin user has authority to create groups.
Step 1: Create new group
When creating groups, it is necessary to add basic descriptive information of the group to be created. The required information is the group's name and a short and long description. It is crucial to provide this information so that users can differentiate and understand the different groups. Once you have filled in the required fields, the Confirm button will activate, allowing you to save the information.
RecommendedIt is recommended that the name and descriptions refer to the business criteria used to make this grouping.
Step 2: Selecting aggregators
In order to create a new group, you need to associate Aggregators with it. A table will be displayed with all the existing Aggregators that are available for selection to assign them to the new group. The list also shows Aggregators that are already assigned to other groups. To create a group, you must assign at least one Aggregator to it.
Keep in mindA merchant can only belong to one Aggregator Group at any given time. So, if you wish to add an Aggregator to a new group, it will no longer receive the offers assigned to the previous group.
Select the Aggregators you wish to include in the new group. The continue button will activate when you have selected at least one merchant.
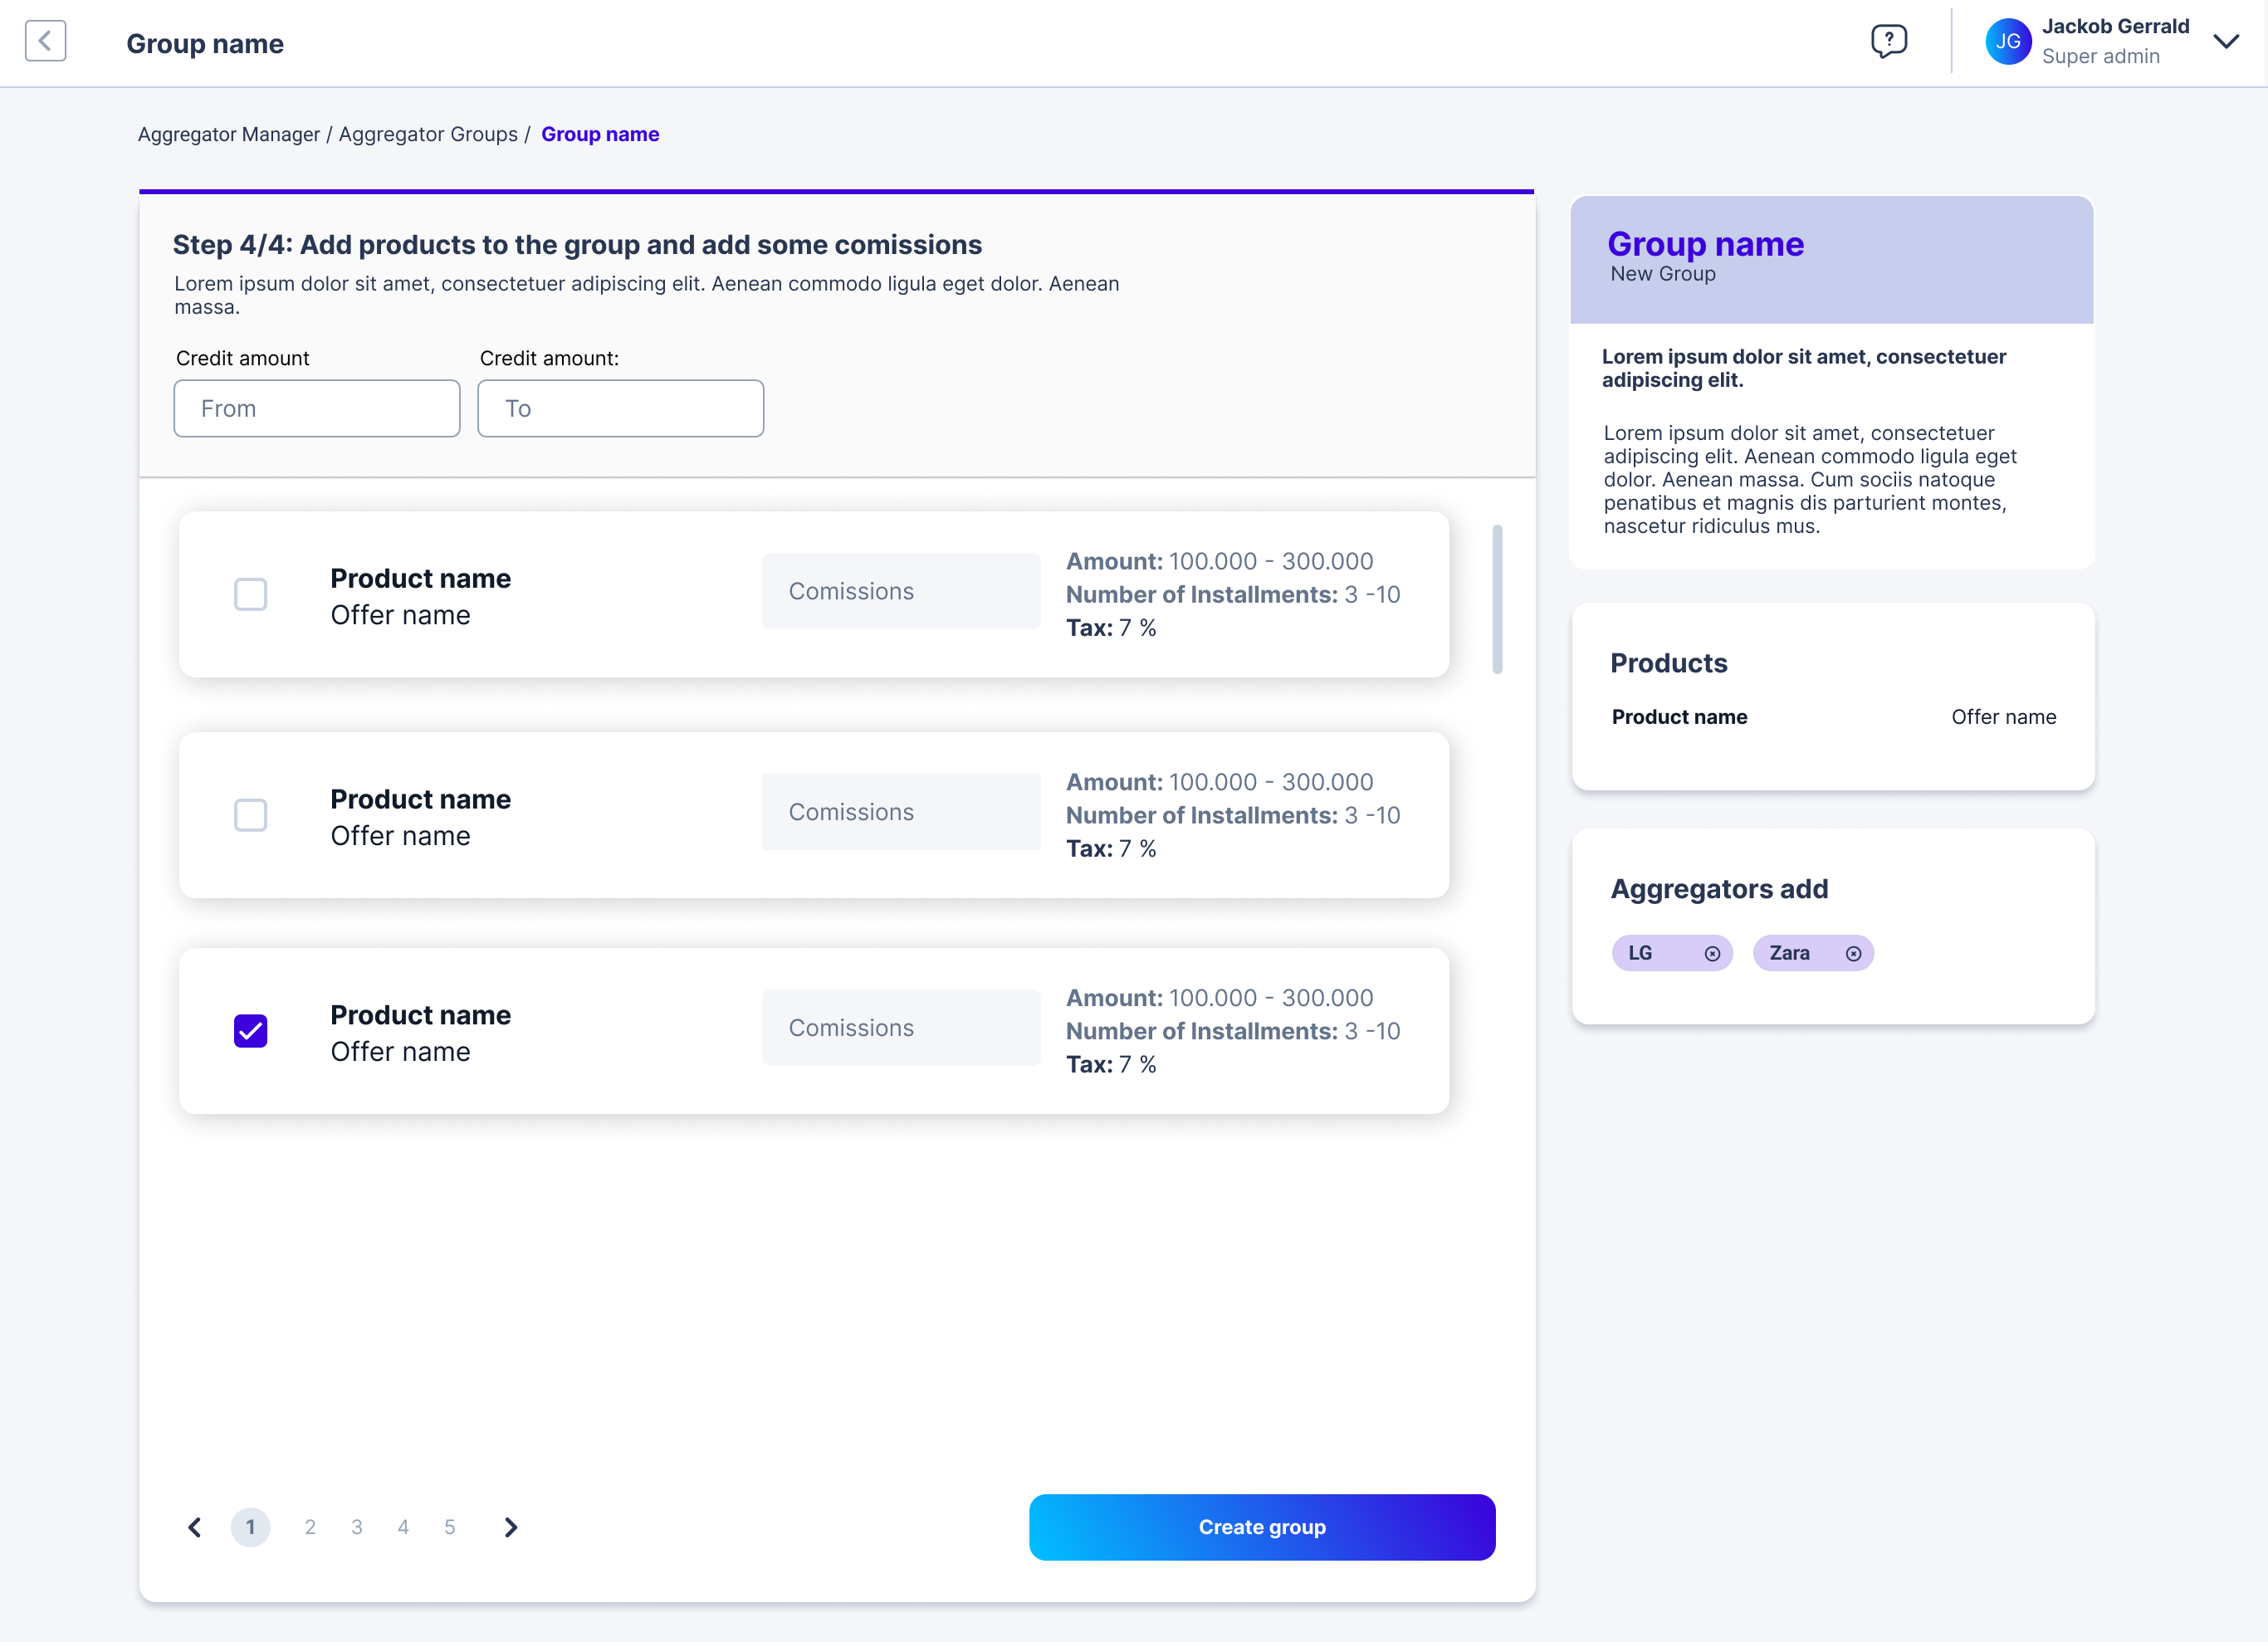
Step 3: Add products to the group and add commissions
Once the Aggregators are selected, the Offers that will apply to the group must be selected. All previously configured offers will be displayed here. For each selected Offer, a commission must be associated to be charged to the Aggregator per credit issued.
Once you finish the configuration, select the Create group button at the bottom of the screen, at the end of the list.
Updated 11 months ago